Configuring Certificates
Certificates is where you securely manage the secure sockets layer/ transport layer security (SSL Secure Sockets Layer (SSL) - A cryptographic protocol designed to secure data transmitted over a network. SSL provided encryption, server (and sometimes client) authentication, and data integrity between two communicating applications (e.g., a browser and a web server)./TLS Transport Layer Security (TLS)
- A cryptographic protocol used to protect data in transit over networks (including the internet) by providing confidentiality (encryption), integrity (tamper protection), and authentication between endpoints.) certificate used by the EPM Data Management web server and related services. It controls which certificate is presented over HTTPS, how it is updated, and how changes are audited.
Secure Sockets Layer (SSL) - A cryptographic protocol designed to secure data transmitted over a network. SSL provided encryption, server (and sometimes client) authentication, and data integrity between two communicating applications (e.g., a browser and a web server)./TLS Transport Layer Security (TLS)
- A cryptographic protocol used to protect data in transit over networks (including the internet) by providing confidentiality (encryption), integrity (tamper protection), and authentication between endpoints.) certificate used by the EPM Data Management web server and related services. It controls which certificate is presented over HTTPS, how it is updated, and how changes are audited.
To set up your certificates remotely:
-
From the EPM User Interface screen, select Options
 - Settings and Users - Settings: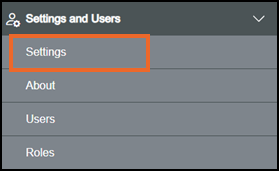
-
The Settings screen displays, select Certificates which then displays on the right-hand side of the screen:
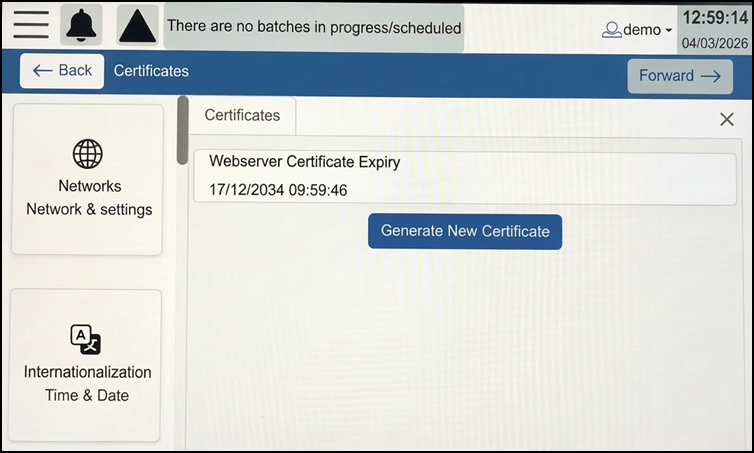 Note - The Generate New Certificate button is available only on the integrated human machine interface (HMI). When a new certificate is generated from the HMI, the certificate is automatically applied and updated on the device.
 -
If you are not already in Configuration lock, the Configuration lock screen displays
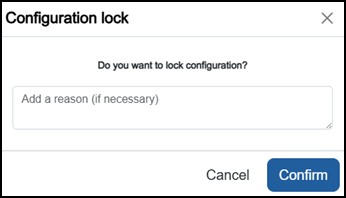
Enter a reason if required and then select Confirm
 . The system configuration is now locked pending the submission of your update and the Configuration Locked
  icon displays on the status bar.Note - Configuration lock does not affect the operation of the EPM device.See Configuration Lock for details.
 -
Select Generate New Certificate
 from the HMI and the Session termination screen displays: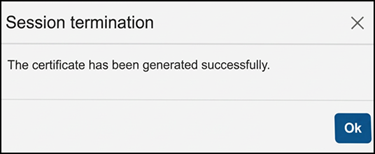
Once you select Ok, you see Connection lost screen. Login to your account using your Username and Password.
Tip - You might see Your connection is not private message, proceed with your IP address and reload to see the Login to your account screen. -
To add the newly generated certificate select Not secure - Certificate details:
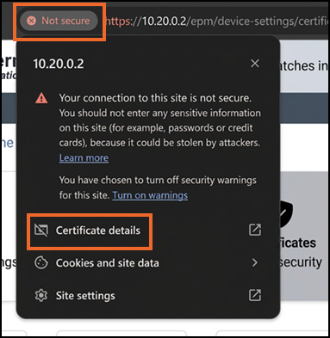 Note - The steps to install certificates are different for each web browser.
 -
The Certificate Viewer screen opens, select Details - Export:
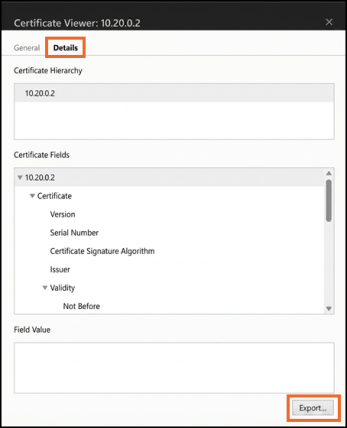 Tip - If you have not already saved your recently downloaded certificate save now.
 -
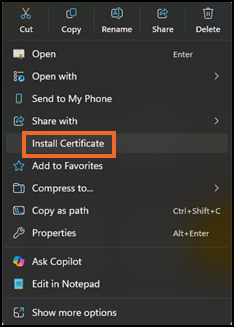
Locate the downloaded Certificate, right click and select Install Certificate:
-
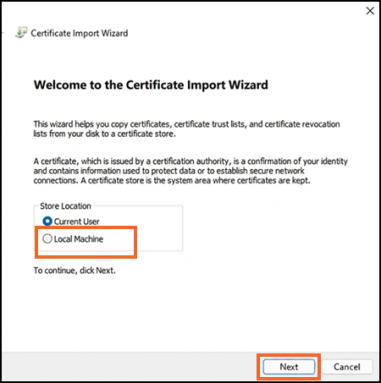
The Certificate Import Wizard Screen displays, select Local Machine - Next:
-
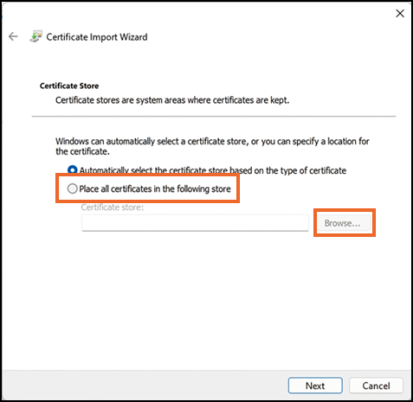
Select Place all certificates in the following store:
-
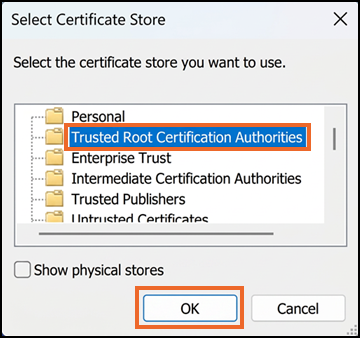
Select Browse - Trusted Root Certification Authorities - Ok:
-
Select Next - Finish:
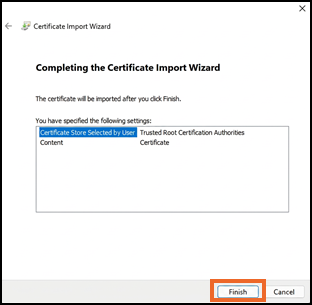 Tip - Refresh the page or close the browser and reopen for the certificate to load.
Last update - August 2026