Configuring Users from the EPM User Interface
To add and configure a user from the EPM User Interface:
-
From the EPM User Interface screen, select Options
 - Settings and Users - Users: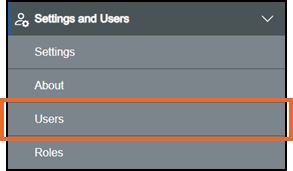
-
Your list of users displays, select Add new local user
 .
. -
If you are not already in Configuration lock, the Configuration lock screen displays
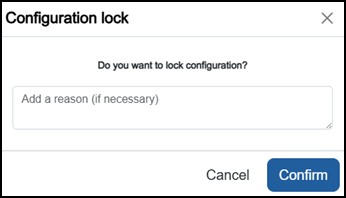
Enter a reason if required and then select Confirm
 . The system configuration is now locked pending the submission of your update and the Configuration Locked
  icon displays on the status bar.Note - Configuration lock does not affect the operation of the EPM device.See Configuration Lock for details.
 -
The Add new user screen displays
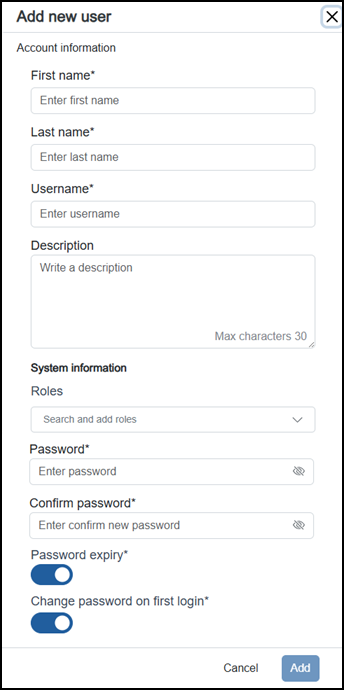
Complete as required:
Note - Fields marked with an asterisk * are mandatory.-
First name - Enter the user's first name.
-
Last name - Enter the user's last name.
-
Username - Enter a unique identifier for this user, please be aware this cannot be updated once set.
Tip - It is common to use the users email address as a username.Note - This is not case sensitive, for example, 'AbC' is regarded as identical to 'abc'. -
Description - Optional, enter any additional details required, maximum 30 characters.
-
System Information:
-
Roles - Select the appropriate role(s) for this user from the list available, see EPM User Interface Roles for details.
Note - You must select at least one Role for each user, or they have no access to any aspect of your system. -
Password - Enter an initial password for the user. Passwords must meet the criteria specified in Settings - Security policies - Password Management and Password Complexity, if they do not meet the requirements the issue is highlighted below in red.
-
Confirm Password - Re-enter the password to confirm.
-
Password expiry - Defaults to On
 . To comply with cybersecurity best practices, it is strongly recommended that passwords be set to expire automatically within a timeframe defined by your organization’s security policies. Switch to Off
  to disable password expiry.See Configuring Security Policies for details.
 -
Change password on first login - Defaults to On
. It is strongly recommended, to comply with cybersecurity best practice, that all new users are forced to reset their password on initial log on. Switch to Off to allow users to continue using the password set for them.
-
-
-
Select Add
 .Tip - The new user displays on the Users list but cannot log in until the pending changes are reviewed and submitted.
 -
Once complete, select Review pending changes
 screen to review updates to the configuration, and submit them. See Reviewing and Submitting Changes for details if required.Note - Reviewing and submitting can be completed in bulk once you have completed all your additions and/or updates.
Last update - April 2026