Configuring a Batch
To configure a batch:
-
From the EPM User Interface screen, select either:
-
Options
 - Batch - Batch Configuration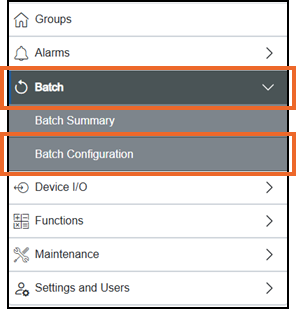
Or
-
From a Live view, select Settings
 - Batch Configuration.See Using the Live View for details.
-
-
The Batch Configuration screen displays
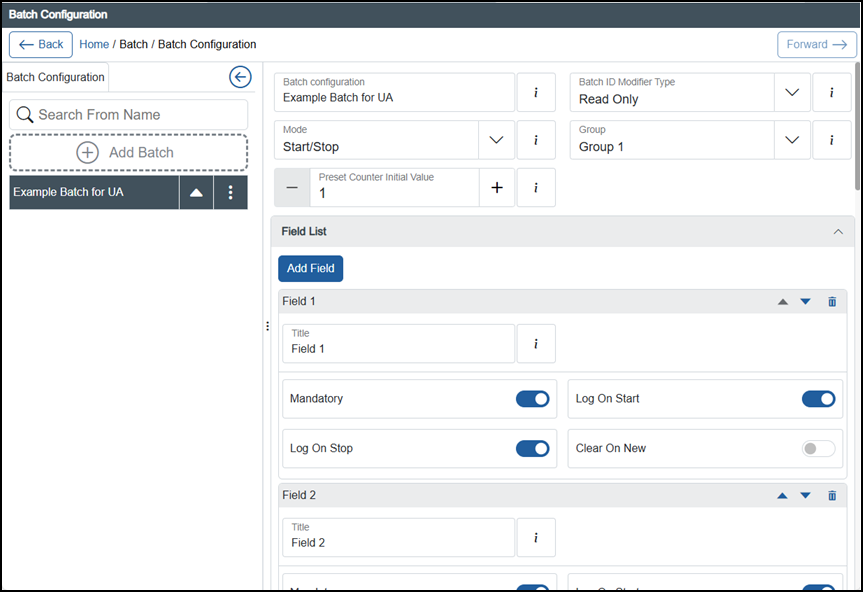
Select either:
-
Add Batch
 to set up a new batch configuration, or
 -
From an existing batch configuration, select Options
 - Copy to create a configuration based on an existing one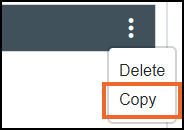
-
-
If you are not already in Configuration lock, the Configuration lock screen displays
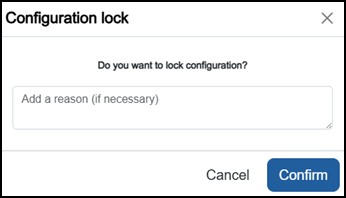
Enter a reason if required and then select Confirm
 . The system configuration is now locked pending the submission of your update and the Configuration Locked
  icon displays on the status bar.Note - Configuration lock does not affect the operation of the EPM device.See Configuration Lock for details.
 -
Depending on your selection in Step 2:
-
For the Add Batch
option, the Add Batch screen displays. The Batch Descriptor defaults to 'Batch n' where 'n' is the next number in sequence from the previous batch. We recommend you enter an appropriate name for this batch configuration to identify it (maximum characters 32) and then select Add  Note - The Batch Descriptor must be unique to this configuration.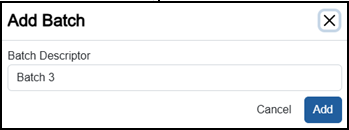
-
For the Copy option, the new batch configuration displays at the bottom of the Batch Configuration list. It is allocated the same name as the original with '(n)' following it, where 'n' is the next number in sequence from the batch configuration you are copying. Update from Batch Configuration as appropriate

Note - This is not case sensitive, for example, 'AbC' is regarded as identical to 'abc'. -
-
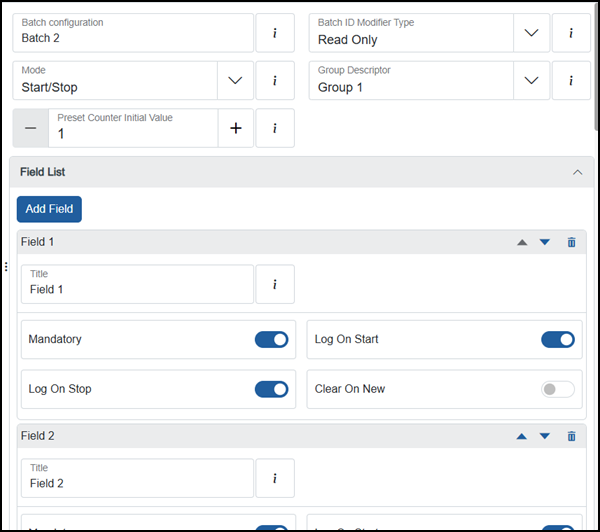
The batch configuration screen displays on the right-hand side
 Tip - Select Information
 to display on-screen tooltips.
Complete as required:
-
Batch configuration - Automatically completes based on either the Add Batch screen or the batch configuration being copied, update if required.
Tip - A descriptive name helps you select the correct batch configuration when running a batch. -
Batch ID Modifier Type - Select from:
-
Read Only - Selected by default, prevents the updating of the automatically created Batch ID for batches run using this configuration.
-
Must Write - Select to force the updating of a Batch ID for batches run using this configuration.
-
-
Mode - Select either:
-
Start/Stop - Selected by default, batches using this configuration have a definite start and stop.
-
Continuous - Select to record continuously until the next batch is started or until batch recording is disabled for batches run using this configuration.
-
-
Group Descriptor - Initially displays with Field cannot be empty, select the Group to link this Batch Configuration to from the available list.
-
Preset Counter Initial Value - Defaults to 1, enter the next batch identifier to be used for the next batch run from this configuration.
Tip - On initial migration to EPM Data Management, it is important you enter the next batch number in sequence from your previous recorder. When the first batch is run from this configuration, the Batch ID applies this preset in conjunction with the Batch ID Modifier Type. -
Field List - There are 10 fields available by default, these can be used to define the labels to run batches using this configuration, for example, 'Order number', 'Product code' and 'Quantity'. Select Add Field
 to add additional fields to this batch configuration, up to a maximum of 20, or select Delete
  to remove them.Tip - Delete unrequired fields or irrelevant information attached to a batch.
Complete each field required as follows:
Tip - The Field List section can display as expanded or collapsed, select Expand to display if required or Collapse
  to hide.
-
Field n where 'n' is equal to the Field number:
-
Title - Defaults to 'Field n+1' where 'n' is equal to the previous Field number on this configuration, update as appropriate.
-
Mandatory - Defaults to On
 to make completion of this field mandatory for batches using this configuration, changeto Off
  to make this field optional.
 -
Log On Start - Defaults to On
to record this information when a batch using this configuration starts, change to Off to disable for this field. -
Log On Stop - Defaults to On
to record this information when a batch using this configuration stops, change to Off to disable for this field. -
Clear On New - Defaults to Off
, changeto On to clear the information for this field when a new batch using this configuration starts.Tip - The above details display as messages on group charts, see Using the Live View for details.
-
-
-
-
Complete all the Fields required for this batch configuration, moving to the next field using and select Delete
 for any Fields not required. Tip - To move through the list of fields, you can use the scroll bar or Next
 and Previous
  or select the field required from the list that displays in the left-hand side, select Expand
  under the batch required to display and Collapse
  to hide.
 -
Once complete, select Review pending changes
 screen to review updates to the configuration, and submit them. See Reviewing and Submitting Changes for details if required.Note - Reviewing and submitting can be completed in bulk once you have completed all your additions and/or updates.
Last update June 2026-